API to SQL: A Simple Azure Data Factory ETL Example
Data Source resource information
We will be using Open5E’s Dungeons and Dragons API today for this tutorial, you can find their website at: Open5e
Resources Needed
I’m going to assume the needed resources for this is all setup, and that they are all able to communicate with each other. If your interested in getting a walk through on basic ADF resources setup needed leave a comment! Here are the resources I’ve setup for this:
An Azure Data Factory instance
Azure SQL DB Server & database
Azure Blob
Azure VNET & Subnets & NSGs & EPs
Linked services setup to the blob and SQL DB inside your Azure Instance
Lets get started!
First we will create a new pipeline and call it “DndArmors”, were going to use their armor API call for our first pipeline today. Inside this new pipeline lets drop down 2 web activities setting the second one on the “success” (green arrow and line) path from the first.
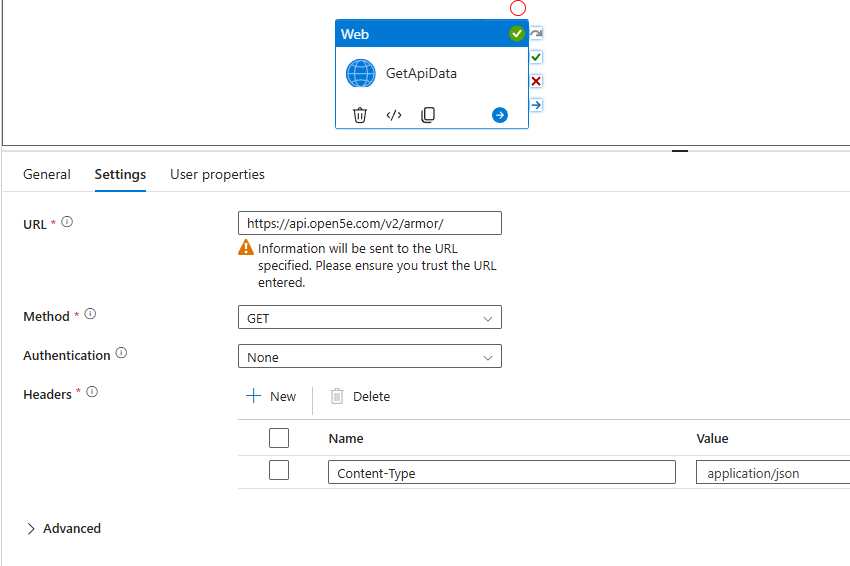
The first activity lets call “GetApiData”, as that is what we will use to query and get the JSON response from Open5e’s armor API.
General settings: lets update the 12 hour timeout down to 10 minutes
Settings Tab
URL set to https://api.open5e.com/v2/armor/
Method set to GET
Authentication for this None, but usually you would need credentials for most APIs
Headers create one new header for name “Content-Type” which should equal “application/json” since we are expecting a JSON response
NOTE: for Advanced settings depending on what runtimes you have and your network policies you may need to change the Integration Runtime that is used there
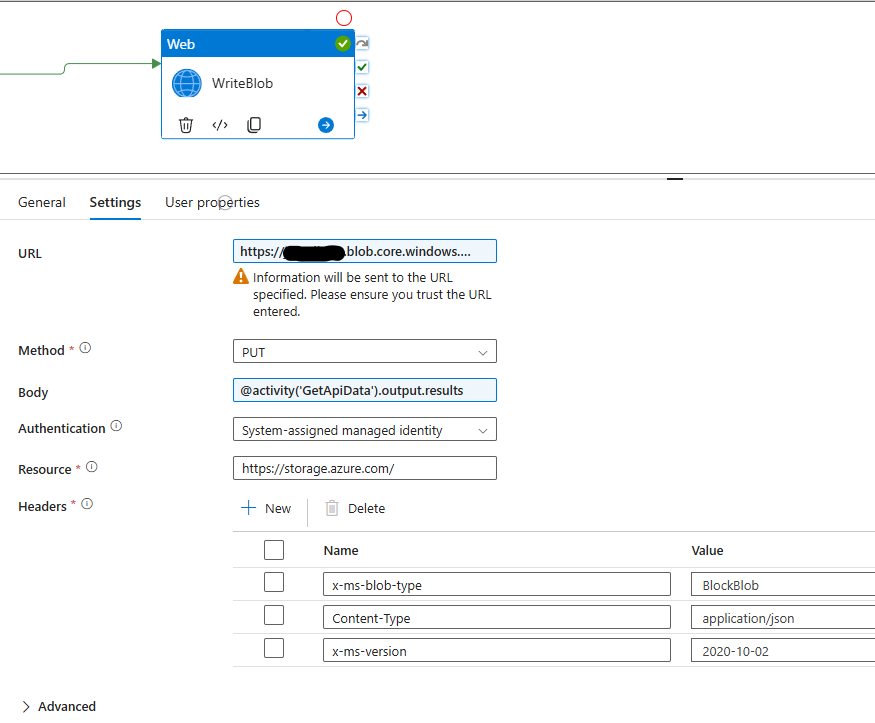
For the second activity this is what we will be using to write the results of the API to a blob so I’m calling it “WriteBlob” for activity name and for settings:
General settings: changing the 12 hour timeout again to 10 minutes
Settings tab
URL set to https://<BLOB-NAME>.blob.core.windows.net/<ContainerName>/<OptionalDirectoryPath>/armor.json
Method set to PUT
Body set to “@activity('GetApiData').output.results” to get the results from our above first step
Authentication is to System-assigned managed identity or what ever other authentication method you are using
Resource is set to “https://storage.azure.com/”
Headers were going to create 3 here
x-ms-blob-type set to BlockBlob
Content-Type set to application/json
x-ms-version set to 2020-10-02 (version that Azure’s API is happy with)
Now we have the armor.json file on our blob inside the container and within the optional directory path we will need to create a dataset for JSON files on the blob, to do this lets use the best practices to ensure its reusable going forwards.
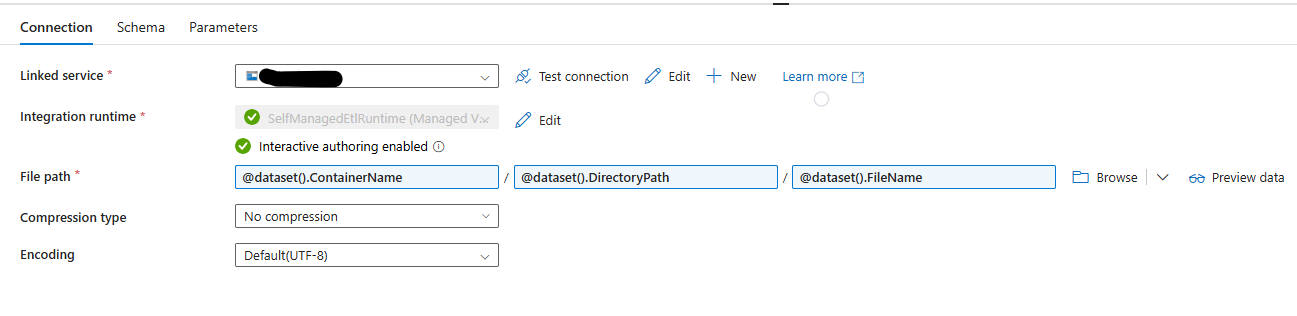
We will select Azure Blob Storage for the new dataset with a JSON format and settings as follows:
Parameters tab create 3 new “String” ones
ContainerName
DirectoryPath
FileName
Linked Service set to your blobs
Integration runtime of your choice
File Path uses the 3 parameters created in above step
Compression type leave as no compression
Encoding leave as Default(UTF-8)
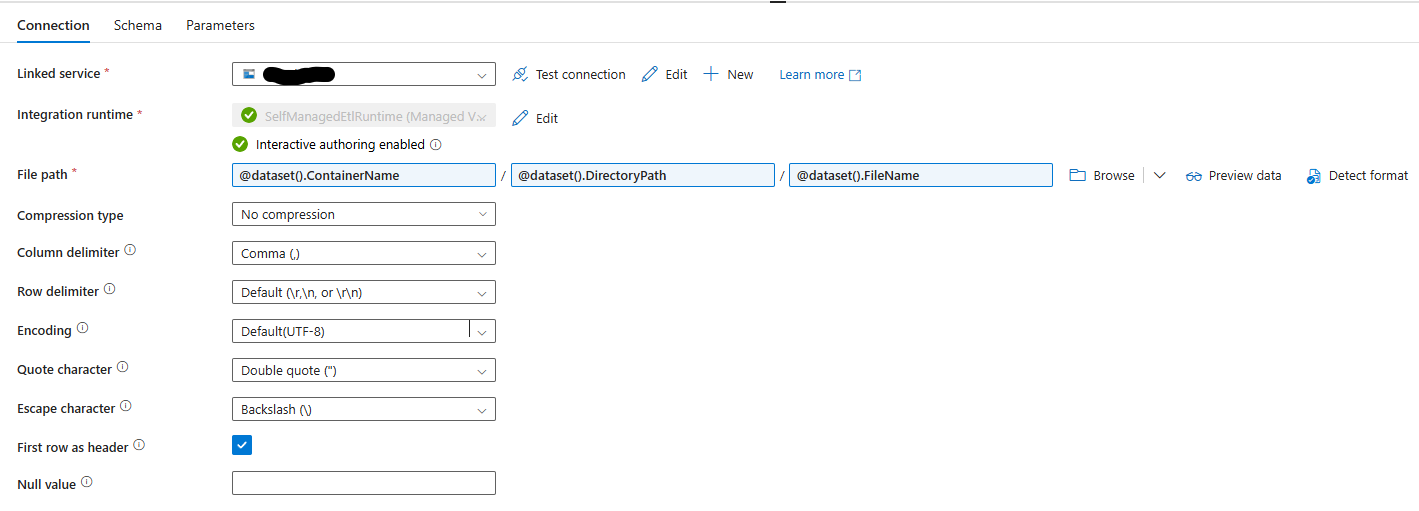
We are also going to need a CSV later on so while we are creating datasets lets get a dynamic reusable dataset also created the same way with parameters for the same blob. Once its setup it should look like below.
Also Create a dynamic dataset for a database table against your azure sql db.

Now were all ready to go back to our armor pipeline and lets add in a dataflow step, were going to use it to put the JSON file into CSV format. So set the source as the dataset you just made for JSON and add in a SINK set to your new CSV.
For the CSV
set to single file on the settings tab for “file name option”
using a parameter “filename” for the output to single file option
optimize tab the “single partition” option needs set.
Once that is setup start a debug session and do the projection on the JSON incoming stream and your settings on the dataflow inside pipeline should look like below, and make sure to set the parameters tab value to the same as the FileName on the WriteCsv.
This will get us a normalized csv file with all columns from the JSON file.

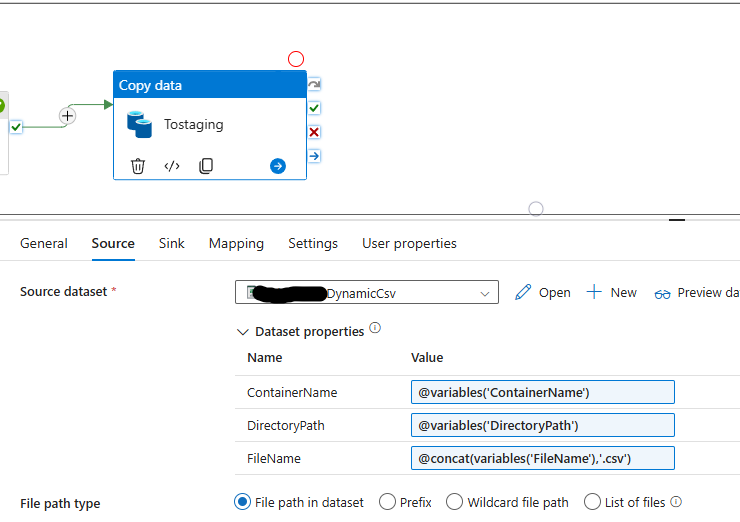
Now we just need to import it into SQL. to do this lets do a copy activity in our pipeline and use our dynamic CSV file as its source
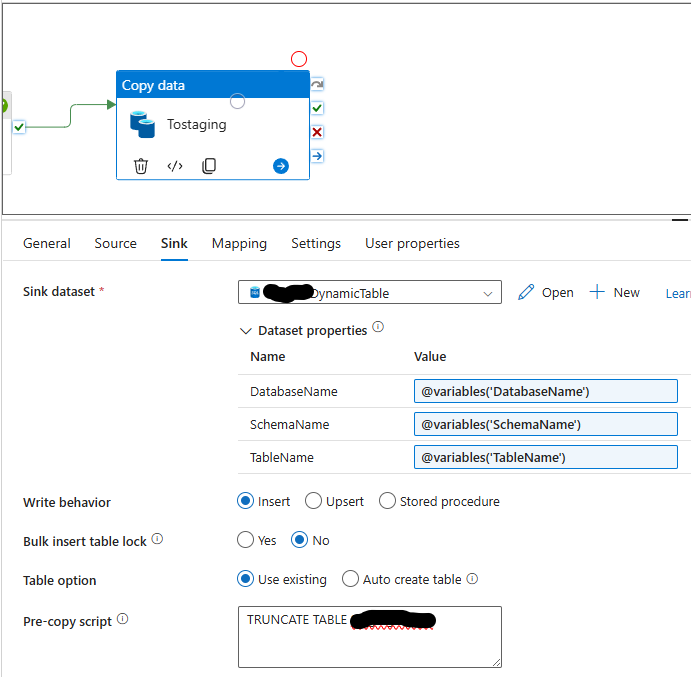
Here is the SQL I used for my staging table
CREATE TABLE Staging.DndArmor (
    ArmorId INT IDENTITY(1,1) PRIMARY KEY CLUSTERED,
    [Url] VARCHAR(2048),
    [Key] VARCHAR(255),
    AC_Display VARCHAR(50),
    Category VARCHAR(50),
    [Name] VARCHAR(255),
    Grants_Stealth_Disadvantage BIT,
    Strength_Score_Required INT NULL,
    AC_Base INT,
    AC_Add_DexMod BIT,
    AC_Cap_DexMod INT NULL,
    Document VARCHAR(2048)
);
And thats it! Thats a basic pipeline that takes a JSON response from an API and gets it into a staging table through ADF! The pipeline should now look like below with the following steps:
Now keep in mind that while you can use Data Flow for this, it best excels at large data transformations and using it to flatten ~100 rows from an API will be a large cost for such small results, in a future blog we will look at using a Python Azure Function to handle our “T” or transformation steps and let ADF handle the orchestration and scheduling.
